NOTE: PosiSoft.net features a redesigned user interface and powerful new reporting capabilities. Users registered prior to the update (April 28, 2016) can still access the older version. All previously saved data is available on both the new and legacy versions. Previously created report templates remain available on the legacy version. To access the old version, logout and select 'Legacy Login'
|
| Getting started with PosiSoft.net |
PosiSoft.net is web-based application offering secure centralized management of PosiTector and PosiTest AT-A readings. Access your data from any web-connected device anywhere in the world. DeFelsko recommends the use of Mozilla Firefox or Google Chrome web browser.
Quick Start
Install PosiSoft Desktop
PosiSoft Desktop allows communication (synchronization) between USB connected instruments and PosiSoft.net (internet connection required).
Install PosiSoft Desktop - required for USB connections (not required for WiFi connected PosiTector Advanced or PosiTector App users).
|
|
Step 1: Connect your Gage |
 |
Connect to a computer using the supplied USB cable or to a WiFi network.
PosiTector Standard: USB only
PosiTector Advanced: USB and WiFi
PosiTector App (SmartLink): WiFi or Mobile data
PosiTest AT-A: USB and WiFi

PosiTector Standard & Advanced models connected to a computer (USB or Bluetooth) require PosiSoft Desktop installed and running to Synchronize Batches with PosiSoft.net.
|
|
|
Step 2: Synchronize Batches |
|
Select "Sync .net Now" from within the instrument's "Connect" menu.
The following occurs during synchronization...
All Batch information (measurement data, batch names, notes) stored within the instrument will synchronize with PosiSoft.net
PosiTector Advanced and PosiTest AT-A models - Batch names modified on PosiSoft.net will synchronize/download to the instrument .
PosiTector models: Alternatively, enable "Auto Sync" within the "Connect" menu to synchronize automatically every time the gage is connected via USB. "Auto Sync" also supports WiFi connections and automatically synchronizes when the instrument powers-up.

The time it takes to synchronize will depend on the number of batches and measurements present within the instrument and internet connection speed. The sync symbol  will remain on the instrument's display until synchronization is complete. If a red triangle icon will remain on the instrument's display until synchronization is complete. If a red triangle icon  displays on the gage, the instrument was unable to communicate with PosiSoft.net. Ensure you are connected to the internet and PosiSoft Desktop is installed and running. displays on the gage, the instrument was unable to communicate with PosiSoft.net. Ensure you are connected to the internet and PosiSoft Desktop is installed and running.
Batches are not erased from the instruments memory during synchronization. They remain on the instrument until they have been deleted by the user or an instrument reset has been performed.
|
|
User Interface
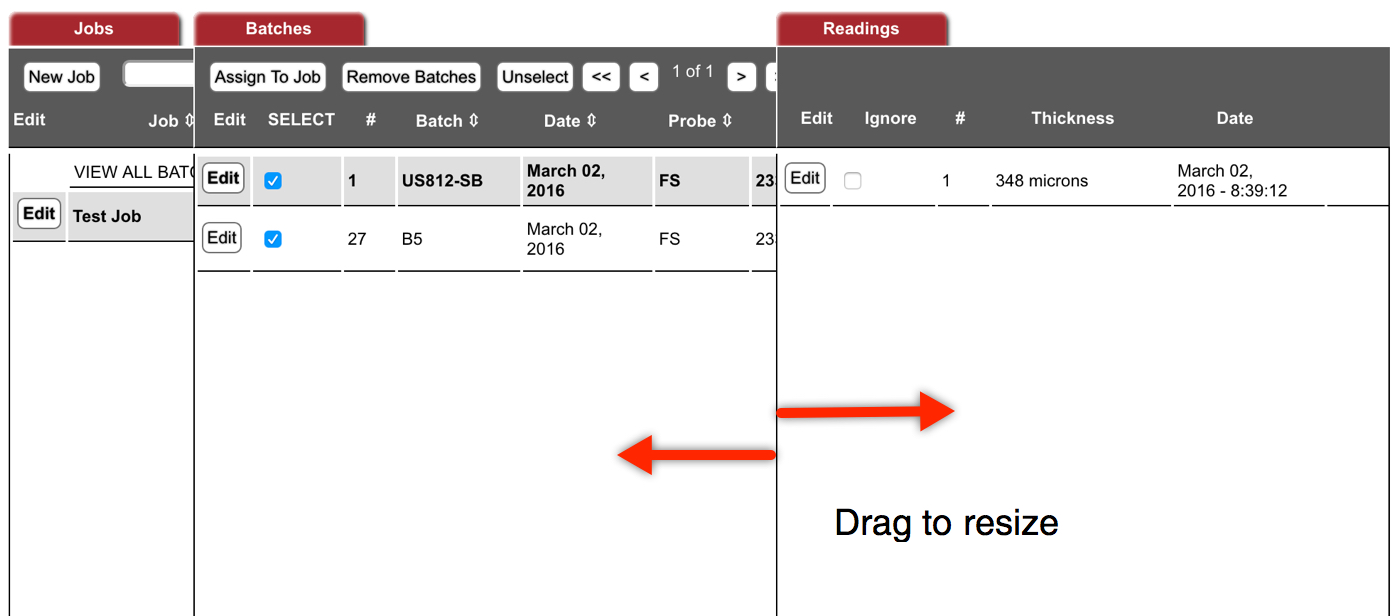
The user-interface consists of a Sidebar and 3 Sections (represented as tabs): Jobs, Batches and Readings

Sidebar Overview
Report Configuration
Create custom report templates and PDF reports.
Report templates provide complete customization of the report including page size, headers, pictures, font type/size, cover pages and more. Select font, resize/realign images and text. Include/exclude information based on instrument type. Save your custom layouts as templates for future use.
See: Report Configuration
Options
User account and gage options. Register/Unregister gages, change gage names, share gages, change account password and associated email address. See: Options
Language
Multi-language support - Select from English, Spanish, French, German, Chinese and Japanese
Downloads
PosiSoft Desktop Manager (PDM) - required for USB and Bluetooth connections (not required for WiFi connected PosiTector Advanced or PosiTector App users).
Sections Overview
Jobs
Jobs allow organization of one or more batches into a group. Jobs can include batches from multiple instruments and probe types. VIEW ALL BATCHES lists all batches that have been synchronized with PosiSoft.net.
Select  to create a Job. See: Jobs to create a Job. See: Jobs
Batches
Displays a list of all batches associated with the selected Job or all batches that have been imported (when VIEW ALL BATCHES is selected within the Jobs section).
Select a batch to view a list of its contained readings. Double click on a batch to display and edit its attributes (rename the batch, add a picture and note). See: Batches
Readings
Displays a list of readings contained within the currently selected batch. Double click on a reading to display and edit its attributes (add a picture and note). See: Readings
Resize Sections
Sections can be resized by dragging the vertical borders separating the views. Hold the mouse button down and drag the border horizontally. Alternatively, click on the section tab to expand its view.
Sort Column (Lists)
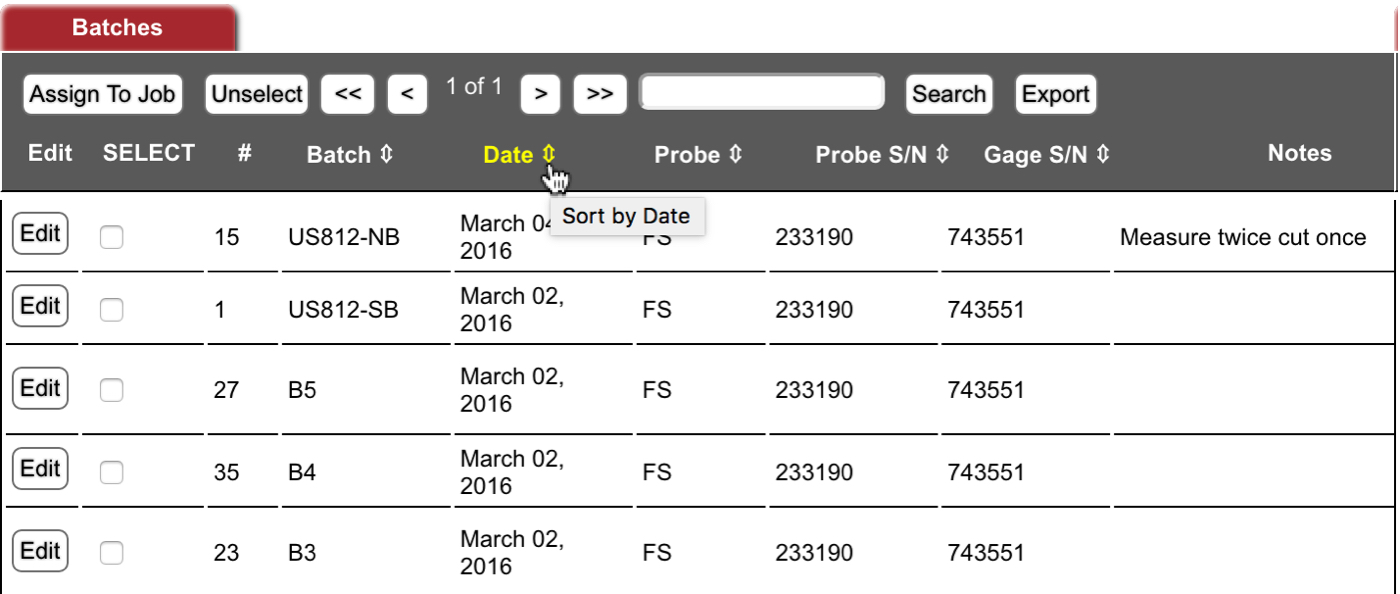
Section lists can be sorted by clicking on the column titles (as shown below).
Jobs
Jobs allow organization of one or more batches into a single group. Jobs can include batches from multiple instruments and probe types. Select a Job to display its contained batches. Only a single Job can be displayed at a time.

VIEW ALL BATCHES: Lists all batches that have been synchronized with PosiSoft.net. The VIEW ALL BATCHES could be considered a master list of all synchronized batches. VIEW ALL BATCHES cannot be deleted.
Creating a new Job
Use the  button to create a new Job. Type a name for the new Job and select Create. The new Job will be displayed within the Jobs list. button to create a new Job. Type a name for the new Job and select Create. The new Job will be displayed within the Jobs list.
If Batches were previously selected they will be added to the new Job (check box ticked by default). Otherwise, batches can be added later. See Add Batches to a Job (below).
Add batches to a Job
Select VIEW ALL BATCHES to display all synchronized batches.
Within the Batches section, select all batches to be included in the Job.
Press the  button and select the desired Job to assign batches. The Job will open and the display its contained batches. button and select the desired Job to assign batches. The Job will open and the display its contained batches.
Note: The assigned batches will also remain in the VIEW ALL BATCHES list. Batches can be associated with multiple Jobs.
 Edit a Job Edit a Job
Use the  button to edit an existing Job. Alternatively, double click the Job. button to edit an existing Job. Alternatively, double click the Job.
Name: Enter a name for the Job
Note: Add descriptive details relating to the Job. Job notes are displayed at the beginning of the report or after the cover text/page (if included).
Image: Include an image for the Job.
Job Notes and Images are displayed at the beginning of the report. They cannot be excluded (ignored) and must be removed from the Job to avoid them from displaying on reports.
When finished, click  to save the Job or to save the Job or  to close the Edit Job window without saving. to close the Edit Job window without saving.
Select  to delete the Job. to delete the Job.
Note: Deleting a Job does not delete contained batches from PosiSoft.net. They are still available in the VIEW ALL BATCHES list and any other Jobs in which the batches are contained.
Batches
Lists batches associated with the selected Job or all synchronized batches when VIEW ALL BATCHES (in Jobs section) is selected.
VIEW ALL BATCHES
Lists all batches that have been synchronized with PosiSoft.net. The VIEW ALL BATCHES could be considered a master list of all synced batches. VIEW ALL BATCHES cannot be deleted.

When in the VIEW ALL BATCHES list, select a batch or multiple batches to be included in the report.
When a Job is Selected
Select a Job to display its contained batches. Only a single Job can be selected at a time.
By default, all associated batches within a Job are included in the PDF report. Selected batches will have a check  in the SELECT box. Click the check box or in the SELECT box. Click the check box or  button to unselect button to unselect  and exclude the batch from the report. Alternatively, batches can be removed from the current Job. and exclude the batch from the report. Alternatively, batches can be removed from the current Job.
 Select a Batch to view a list of its contained readings. Select a Batch to view a list of its contained readings.
Edit a Batch
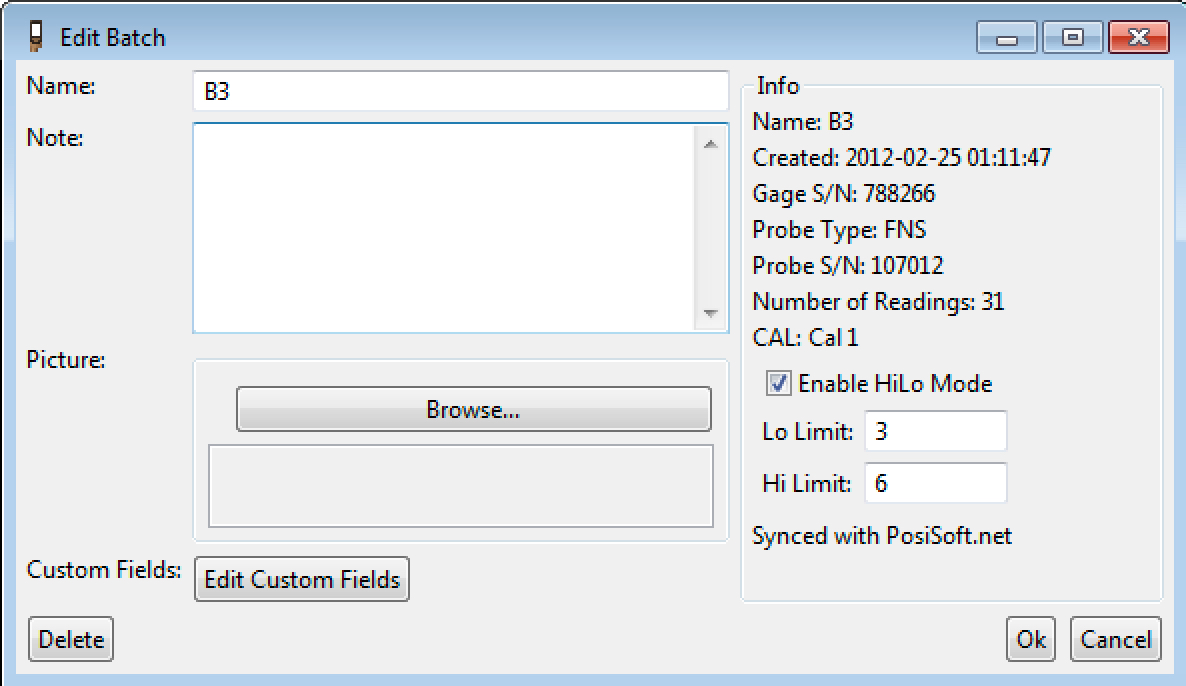
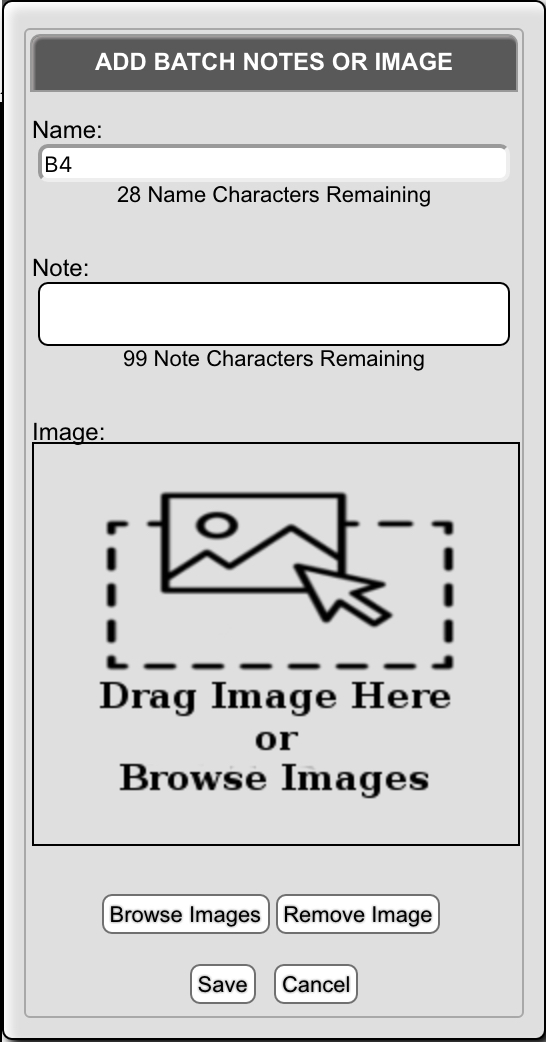
Use the  button to edit a Batch. Alternatively, double click the Batch. button to edit a Batch. Alternatively, double click the Batch.
Name: Enter a name for the Batch
Note: Add descriptive details relating to the Batch. Batch notes are included in reports by default. To exclude, uncheck Batch Note within the associated Report Template.
Image: Include an image for the Batch.
When finished, click  to save the Batch or to save the Batch or  to close the Edit Batch window without saving. to close the Edit Batch window without saving.
NOTE: Batches cannot be deleted from PosiSoft.net. They remain on PosiSoft.net until the associated gage has been unregistered with the Delete batches checkbox selected  . .
Batch Menu

 Add selected (checked) Batches to a Job. Check desired Batches and select the Assign to Job button. Then select the Job Name to add the Batches. The Job will automatically open and display its associated Batches. Add selected (checked) Batches to a Job. Check desired Batches and select the Assign to Job button. Then select the Job Name to add the Batches. The Job will automatically open and display its associated Batches.
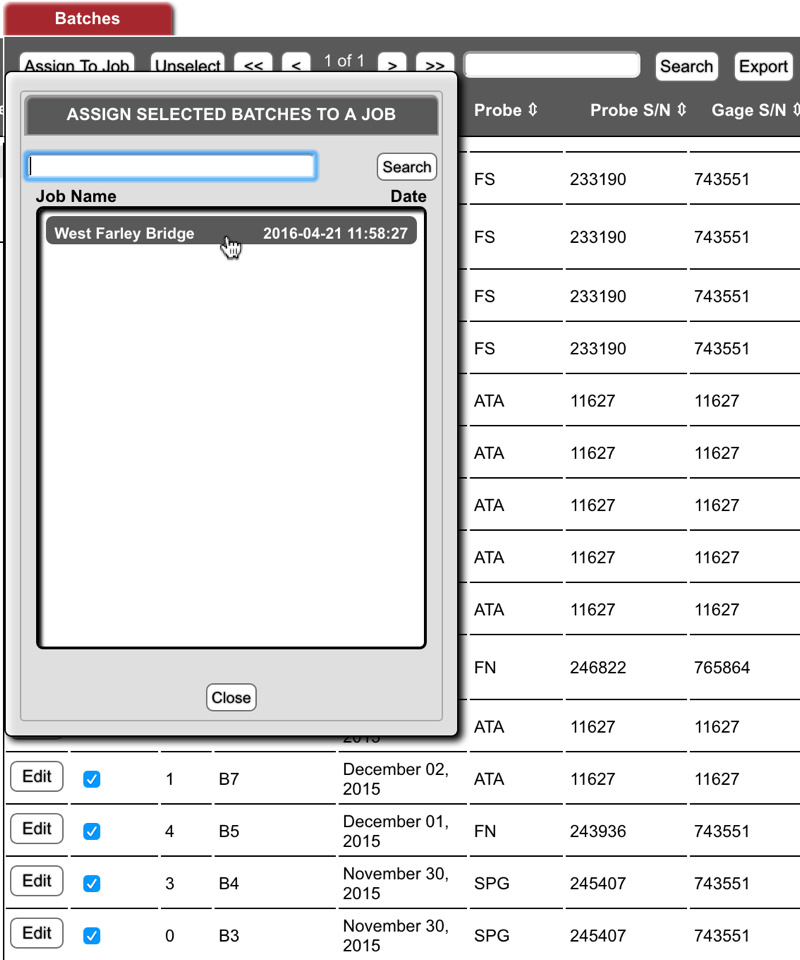
 Remove selected batch(es) from currently selected Job. Removed batches remain in VIEW ALL BATCHES. The Remove Batches button is visible only when a Job is selected. Remove selected batch(es) from currently selected Job. Removed batches remain in VIEW ALL BATCHES. The Remove Batches button is visible only when a Job is selected.
 Unselects the highlighted batch (removes the check mark) for exclusion from reports. Alternatively, click on the checkbox to remove the check mark. Unselects the highlighted batch (removes the check mark) for exclusion from reports. Alternatively, click on the checkbox to remove the check mark.
 When the number of rows exceeds the allowable limit, the data will be split into multiple pages. Use the arrow buttons to navigate between pages. When the number of rows exceeds the allowable limit, the data will be split into multiple pages. Use the arrow buttons to navigate between pages.
 Search Batches for specific keywords (notes/batch names) or gage/probe serial number/type. Search Batches for specific keywords (notes/batch names) or gage/probe serial number/type.
 Exports the selected (checked) batches as a comma separated value (.CSV) file which can easily be imported into Excel and other supporting applications. Exports the selected (checked) batches as a comma separated value (.CSV) file which can easily be imported into Excel and other supporting applications.
Batch Column List

A check mark  in the SELECT column indicates the batch will be included in reports. Uncheck to exclude from reports. in the SELECT column indicates the batch will be included in reports. Uncheck to exclude from reports.
Batch: Displays the Batch name. Double click a Batch or select the Edit button to rename the batch.
Gages automatically generate the Batch name as B1, B2, etc. for multiple batches. Batch names can be altered to something more meaningful by double clicking on the Batch or selecting the Edit button. Alternatively, PosiTector Advanced and PosiTest AT-A users can change the batch name directly from the menu of the gage.
#: Displays the number of readings contained in a Batch
Created: Displays the date/time stamp when the Batch was created
Probe S/N: Serial Number of the PosiTector probe used for associated readings
Type: The model of the PosiTector probe or PosiTest AT-A instrument
Gage S/N: Serial number of the PosiTector body or PosiTest AT-A instrument
Notes: Displays notes associated with the Batch.
When the number of rows exceeds the allowable limit, the data will be split into multiple pages. Use the arrow buttons to navigate between pages.
Readings
Displays all readings present within the selected batch or batches. Below is an example of PosiTector 6000 readings.
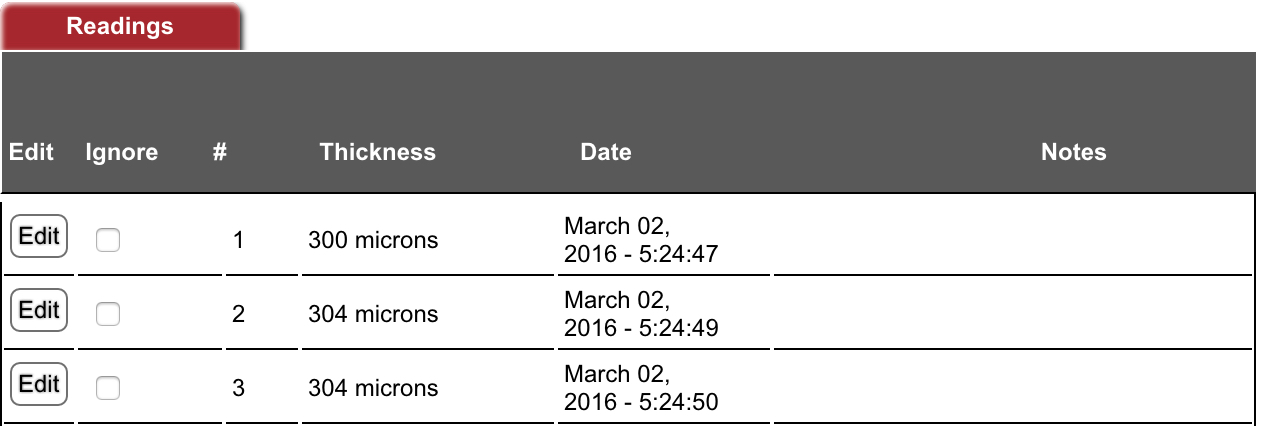
Column List
Ignore: A check mark  indicates the reading is excluded from the batch statistics but does display on reports (with an ignored indicator). To exclude a reading from the report entirely, uncheck the "Hide Ignored" option within the Report Configuration (for the associated probe/gage). indicates the reading is excluded from the batch statistics but does display on reports (with an ignored indicator). To exclude a reading from the report entirely, uncheck the "Hide Ignored" option within the Report Configuration (for the associated probe/gage).
#: Reading number
Thickness: In the above PosiTector 6000 example, the displayed title represents Thickness. This columns title will be different for each instrument or probe type . For example a PosiTector DPM will display multiple parameters (columns): RH, Ta, Ts, Td and Ts-Td. A PosiTector 200 could display up to 3 individual layer thicknesses.
Date: Displays the date/time stamp when the reading was stored on the gage.
Notes: Associated Reading notes.
Edit
Double click on a reading or the Edit button to display the Edit Reading window.
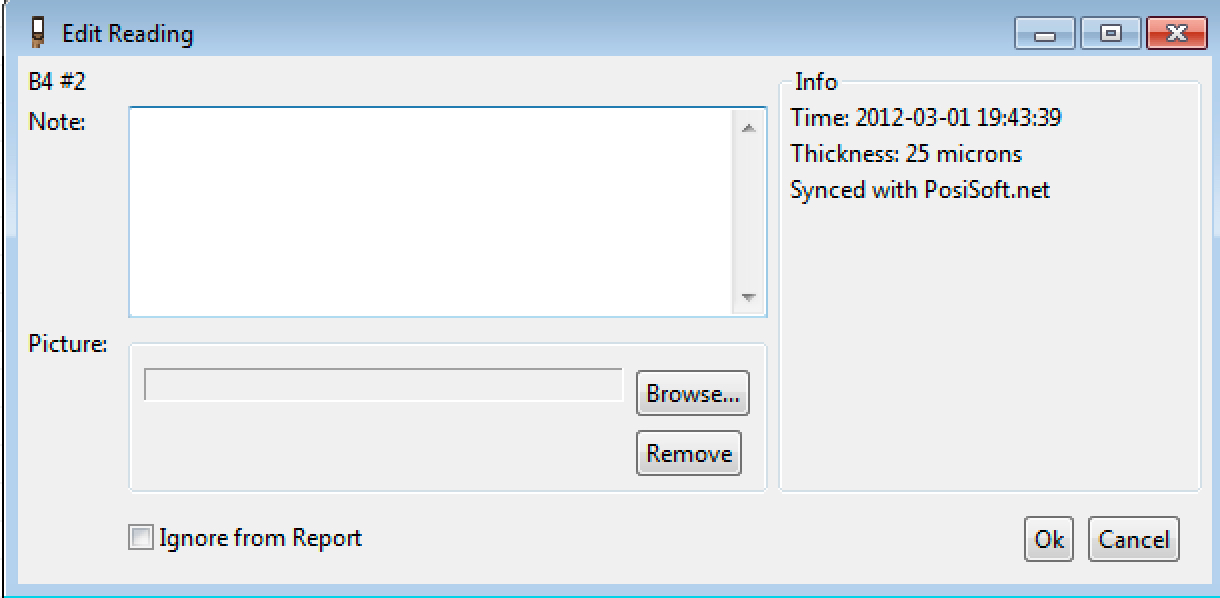
Note: Add descriptive text for the selected Reading
Image: Include a Reading Picture. Click Browse and navigate to the picture you would like to include.
By default, reading images and notes are displayed on reports. To exclude them, uncheck Note and Picture for the associated instrument type within the Report Configuration.
 Ignore Reading: When checked, the reading is excluded from the batch statistics but does display on reports (with an ignored indicator). To exclude a reading from the report entirely, uncheck the "Hide Ignored" option within the Report Configuration (for the associated probe). Ignore Reading: When checked, the reading is excluded from the batch statistics but does display on reports (with an ignored indicator). To exclude a reading from the report entirely, uncheck the "Hide Ignored" option within the Report Configuration (for the associated probe).
Info: Displays the date and time the reading was taken/stored into the instrument's memory and its value. PosiTest AT-A models also display editable nature of fracture layer information.
Click  to save the edits or to save the edits or  to close the Edit Reading window without saving. to close the Edit Reading window without saving.
NOTES:
Reading date/time and units are imported from the instrument. These parameters cannot be altered.
Individual readings cannot be deleted. Instead, select  Ignore from Report as explained above. Ignore from Report as explained above.
Report Configuration
PosiSoft.net offers customizable reporting tools which allows the user to add pictures, notes, headers, cover pages/text and more.
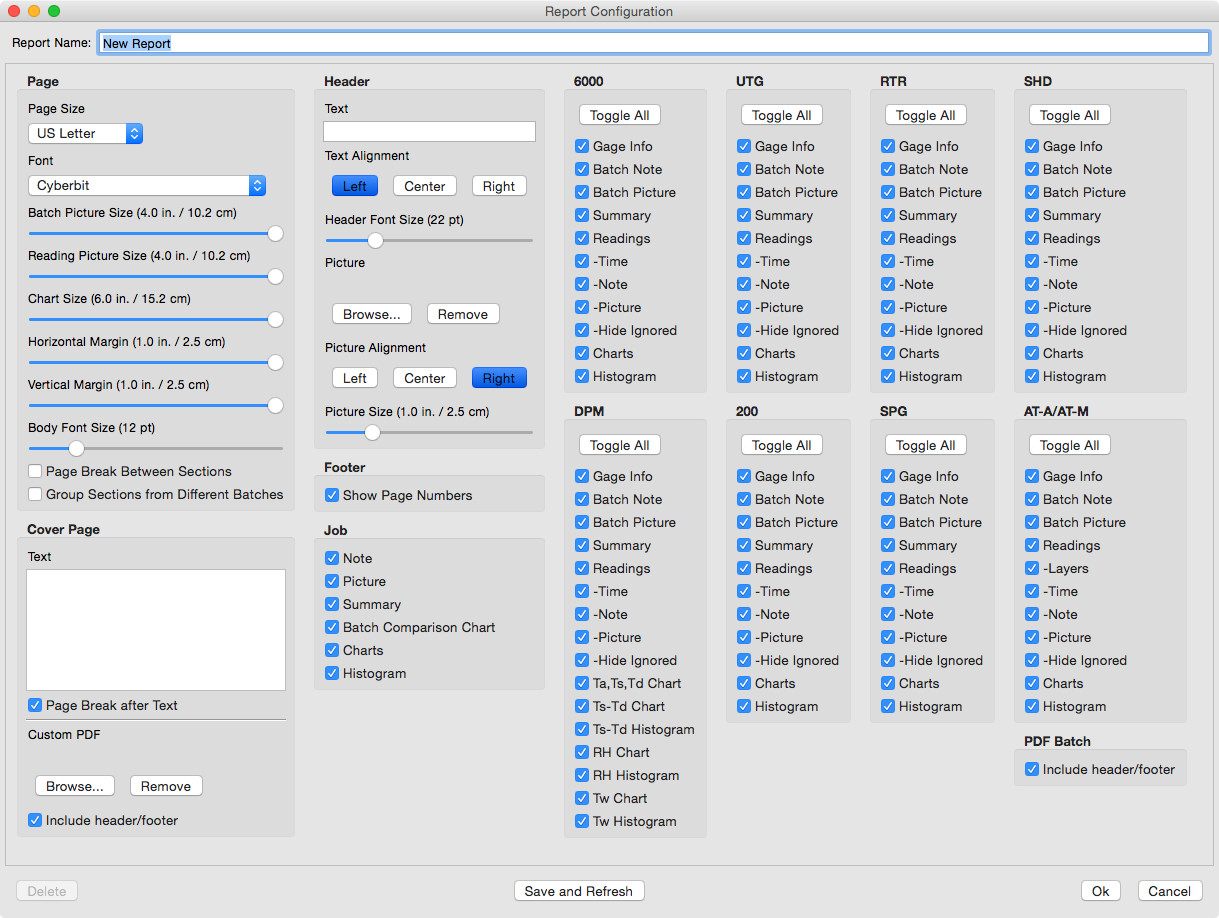
Templates provide complete customization of the report including page size, headers, pictures, font type/size, cover pages and more. Select font, resize/realign images and text. Include/exclude information based on instrument type. Save your custom layouts as templates for future use.
Select Report Template - select from DEFAULT or custom user created report templates
 modify the currently selected report template. The Default template cannot be modified or deleted. A Report Configuration window will open. modify the currently selected report template. The Default template cannot be modified or deleted. A Report Configuration window will open.
 create a new report template (see Creating Custom Report Templates). Click on an existing template to use as a starting point for the new template. create a new report template (see Creating Custom Report Templates). Click on an existing template to use as a starting point for the new template.
 delete the selected report template (the default template cannot be deleted) delete the selected report template (the default template cannot be deleted)
 creates a PDF report in a new browser window or tab. Print or save the PDF within the browsers viewer. creates a PDF report in a new browser window or tab. Print or save the PDF within the browsers viewer.
NOTE: Jobs or Batches containing large amounts of data will take longer for report generation.
Creating Custom Report Templates
Select  to create a customized report. Type a name for the template and click Save. to create a customized report. Type a name for the template and click Save.
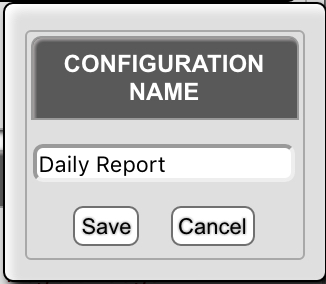
Select  to modify the selected report template. When complete select to modify the selected report template. When complete select  to save the template or to save the template or  to exit the report configuration without saving changes. to exit the report configuration without saving changes.

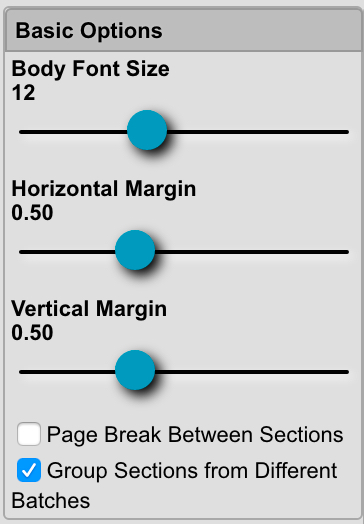
Basic Options
Body Font Size: Font size for text used within the report (non-title)
Horizontal Margin: Left and Right margins
Vertical Margin: Top and Bottom margins
 Page Break Between Sections: When selected, a page break will occur between Summaries, Readings, Charts, Images, Notes and Histogram sections. Page Break Between Sections: When selected, a page break will occur between Summaries, Readings, Charts, Images, Notes and Histogram sections.
 Group Sections from Different Batches: When selected all readings, charts, and histograms will be grouped together for all reported batches. Group Sections from Different Batches: When selected all readings, charts, and histograms will be grouped together for all reported batches.
|
 |
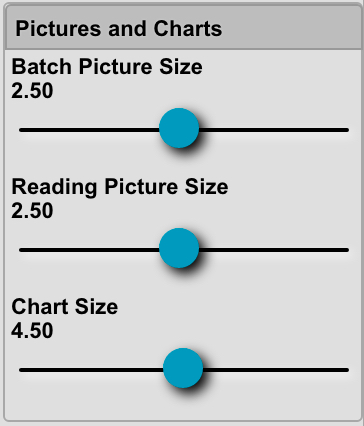
Pictures and Charts
Batch Picture Size: Alter the size of included batch pictures
Reading Picture Size: Alter the size of the reading pictures
Chart Size: Alter the size of included charts
|
 |
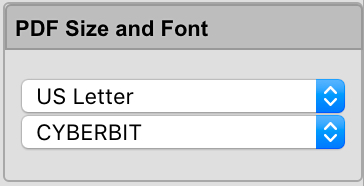
PDF Size and Font
Page Size: A4 or US Letter
Font: Select from available fonts
|
 |
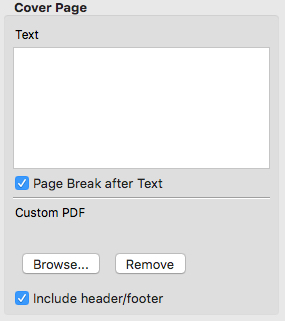
Cover Page
Text: Add text to be included at the beginning of the report. This text can span several pages.
 Page Break After Text: Insert a page break after included cover page text. Page Break After Text: Insert a page break after included cover page text.
|
 |
Header and Footer
Header
Report Title: Text displayed within the header
Text Alignment: Left, Center or Right alignment
Heading Font Size: The size of the header font will display in the report.
Picture: Add a picture to be included in the header.
Example: a company logo
Picture Alignment: Left, Center or Right alignment
Picture Size: The size header picture will display in the report
Footer
 Include Page Numbers: Display the page number at the bottom center of each report page. Include Page Numbers: Display the page number at the bottom center of each report page.

|
 |
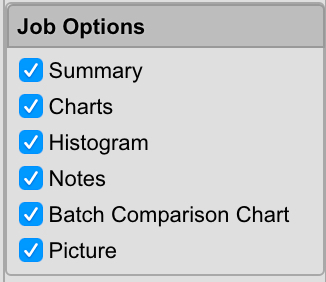
Job Options
Display Job related information on printed reports.
By default, all options are selected. To exclude, uncheck their respective box.
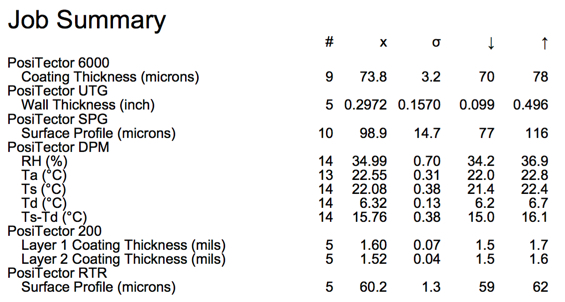
Summary: includes a summary (by instrument type) at the beginning of a Job report. The summary combines batches for like instrument types (sorted by the date and time the readings were taken).
Charts: display associated charts
Histogram: display associated histograms
Notes: include a Job note
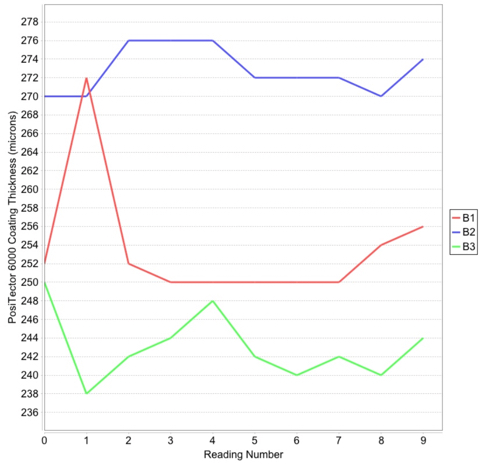
Batch Comparison Chart: includes a chart containing all batches for an instrument type. Ideal for comparison between multiple batches.
Picture: include a Job picture
|
 |
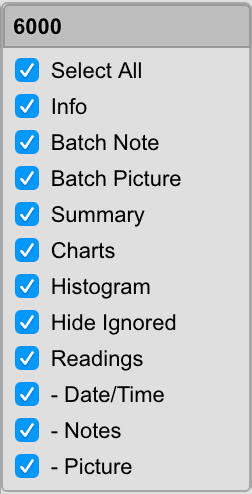
Report Detail (by gage/probe type)
 Select All: selects or unselects all check boxes Select All: selects or unselects all check boxes
 Gage Info: include gage information such as model and serial number Gage Info: include gage information such as model and serial number
 Batch Note: include batch notes Batch Note: include batch notes
 Batch Picture: include batch pictures Batch Picture: include batch pictures
 Summary: display statistical summary Summary: display statistical summary
 Charts: Display associated charts Charts: Display associated charts
 Histogram: Display associated histograms Histogram: Display associated histograms
 Hide Ignored: When ticked Ignored Readings will not be included on reports, statistics and charts. Hide Ignored: When ticked Ignored Readings will not be included on reports, statistics and charts.
 Readings: Readings:
 Time: Date and Time Time: Date and Time
 Note: Reading Note Note: Reading Note
 Picture: Reading Picture Picture: Reading Picture
|
 |
Options
Register Gage - Instruments must be registered with PosiSoft.net to access synchronized data. Multiple instruments can be registered to a single account.
Enter your Gage serial number and unique key as displayed on your gage within Setup-> Gage Info.
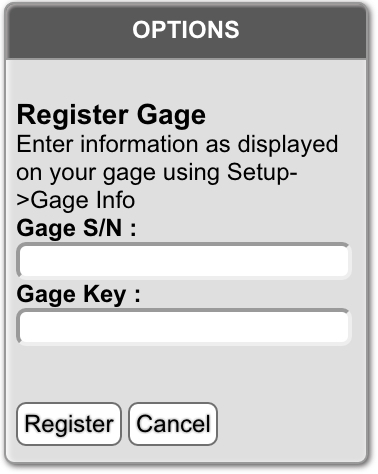
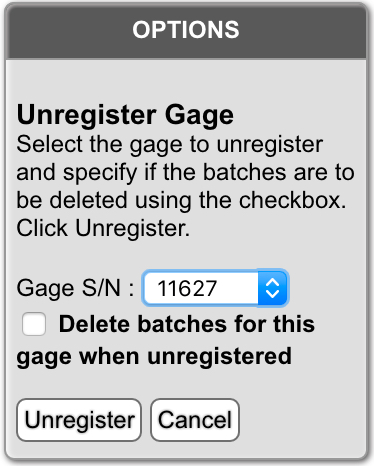
Unregister Gage - unregister a gage from your PosiSoft.net account. Once unregistered, it can be registered by another user.
When you unregister a gage, existing Batches associated with that gage will no longer be visible within your account. If you did not select "Delete batches for this gage when unregistered" your batches will remain on PosiSoft.net and will be visible to the next user who registers the gage. If you require access to these Batches, re-register the gage with your account (if it has not already been registered by another user).
To delete all associated Batches during unregistration, simply click the "Delete batches for this gage when unregistered" checkbox  . This action is permanent and cannot be reversed. This prevents the next registered user from seeing your Batch data. . This action is permanent and cannot be reversed. This prevents the next registered user from seeing your Batch data.
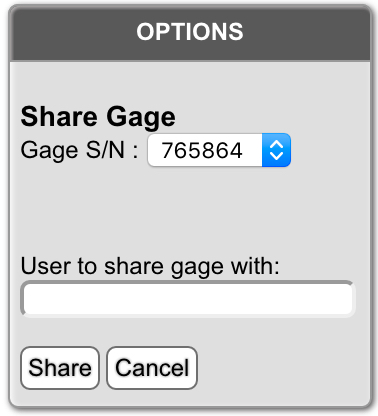
Share Gage - share your Batch data with another user. The shared user will be able to edit Batches/Readings.
Select the gage and enter the user account you wish to share with. Click "Share". To unshare in the future, simply repeat this process and remove the shared users email address, click "Save".
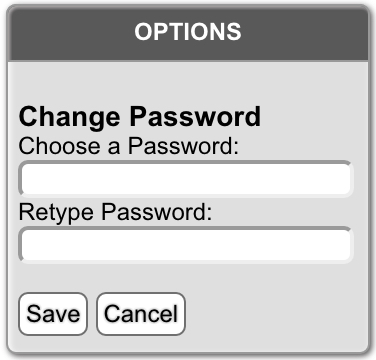
Change Password - allows user to change password. Choose a new password, retype the password and click "Save".
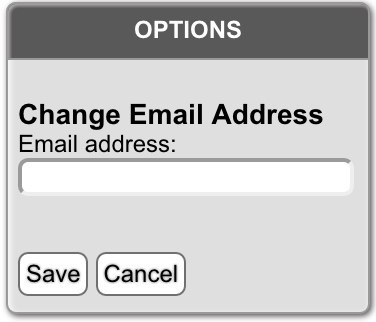
Change Email - update the email address associated with your account. Enter new email address and click "Save".
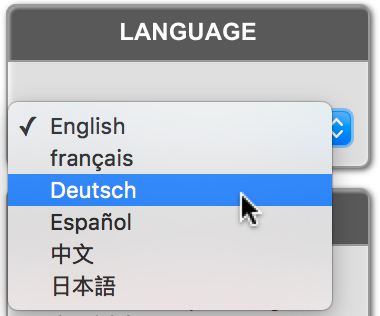
Language
Multi-language support - Select from English, Spanish, French, German, Chinese and Japanese
Gage Compatibility
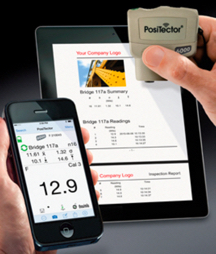
PosiSoft.net is compatible with all PosiTector's (serial number over 700000), PosiTector SmartLink, and supporting PosiTest AT-A instruments (color touch screen models).

Connection Options
USB
Before connecting your instrument to the PC, ensure PosiSoft Desktop (4.1.0 or greater) is installed and running. PosiSoft Desktop is required to Synchronize Batches with PosiSoft.net when using a USB connection.
Connect to the computer using the supplied USB cable. The computer will automatically recognize the instrument (does not require driver installation). A reboot is not necessary after connecting the gage to the computer.
Enable "Auto Sync" within the "Connect->USB" menu to synchronize automatically every time the gage is connected via USB. (Auto Sync supports USB connections only). Alternatively, select "Sync .net Now" within the "Connect->USB" menu.
The time it takes to synchronize will depend on the number of Batches and measurements present within the gage and internet connection speed. The sync symbol  will remain on the gages display until synchronization is complete. If a "triangle with an exclamation point" displays on the gage, the instrument was unable to communicate with PosiSoft.net. Ensure you are connected to the internet and PosiSoft Desktop is installed and operational. will remain on the gages display until synchronization is complete. If a "triangle with an exclamation point" displays on the gage, the instrument was unable to communicate with PosiSoft.net. Ensure you are connected to the internet and PosiSoft Desktop is installed and operational.

When your PosiTector is first connected to your Windows PC via a USB cable, an enumeration process is started that installs device drivers without re-booting your computer. You may see several pop-up windows. Wait for the entire process to be completed before proceeding.
 WiFi (PosiTector Advanced and PosiTest AT-A models only) WiFi (PosiTector Advanced and PosiTest AT-A models only)
PosiTector Advanced and PosiTest AT-A models feature WiFi wireless communication. PosiSoft can take advantage of this technology by synchronizing Batches wirelessly without the need to connect a cable. Ideal for synchronizing stored measurement on the shop floor or in the field (using a mobile hotspot).
1. Connect your instrument to an internet connected WiFi network
2. Select "Sync Now" from within the instruments associated "Connect" menu.
The time it takes to synchronize will depend on the number of Batches and measurements present within the gage and internet connection speed. The sync symbol  will remain on the gages display until synchronization is complete. If a "triangle with an exclamation point" displays on the gage, the PosiTector was unable to communicate with PosiSoft.net. Ensure the WiFi network you are connecting to has internet access and retry. will remain on the gages display until synchronization is complete. If a "triangle with an exclamation point" displays on the gage, the PosiTector was unable to communicate with PosiSoft.net. Ensure the WiFi network you are connecting to has internet access and retry.
For more information on connecting your PosiTector to a WiFi network visit: www.defelsko.com/wifi/
|


 Edit a Job


